In our React tutorial, we have learned how components form the building blocks of our UI, and props allow parent components to pass down data to the child components. However, for an interactive application, the components must manage their own data, which changes over time. This is where the concept of states comes into play.
In this article, we will look into the component state and how to make our components interactive using this state.
Component State
The component state refers to the component's internal data that is managed by the component itself. While the props are passed down to children from parents and are read-only for the child, the state can be altered from within the defined component. When the state of a component is changed, React efficiently re-renders the component and its children to update the UI according to the new data. This ability makes React interactive and responsive to user actions and events. Props can be thought of as information passed down from parent to child, whereas state is the information controlled and owned by the component itself.
The useState Hook
In React and within the functional components, Hooks are the special functions that are used to "hook into" the React state and lifecycle features. The useState hook is the most fundamental and widely used hook. To use it, you need to import it from the React library as follows:
import { useState } from 'react';
Once imported, it can be called inside the functional components. It accepts an optional argument and returns an array with 2 values, i.e.,
i. Current State: Holds the current data that is being managed.
ii. The State Update Function: A function that updates the state value.
To understand this hook, let's create a new Counter component. Go to the src folder of your project and create a new file named Counter.js.
import { useState } from 'react';
function Counter() {
  const [counter, setCounter] = useState(0);

  return (
    <div>
      <h1>Count: {counter}</h1>
      <button onClick={() => setCounter(counter + 1)}>Add 1</button>
    </div>
  );
}

export default Counter;
In the above code, we have defined a Counter component that initially uses the useState hook to set the counter. Then, when the user clicks the button, the component's state is updated via the setCounter().
Now, add the following code to the App.js:
import React from 'react';
import Counter from './Counter';

function App() {
  return (
    <div>
      <Counter />
    </div>
  );
}

export default App;
In the App.js, we simply imported and called the component with the <Counter /> tag.
Here is the output of the above component:
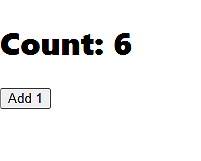
Please note that you should never modify the state variable directly and use the state update function. If you change the state directly, React would not re-render, and your UI will fail to update according to the data.
Handling Events to Update State
In our Counter example, we have used the onClick() event to trigger the state update and tell React to re-render the component to update the UI. To understand this more, let's create another component that toggles the text between "ON" and "OFF" when the user clicks the button.
Create a new JS file named "Toggle.js" in the src folder.
Add the following code to the new file:
function Toggle() {
  const [isToggled, setToggle] = useState(false);

  return (
    <button onClick={() => setToggle(!isToggled)}>
      {isToggled ? 'ON' : 'OFF'}
    </button>
  );
}

export default Toggle;
In the above code, we have used the useState hook to initialize the isToggle state variable. Inside the return, we have declared an arrow function ()=>setToggle(!isToggled) with the ternary operator (conditional operator) to determine and change the component state. When the user clicks on the button, the component's state toggles between true and false, ultimately leading to the re-rendering of the component, which shows ON and OFF on the screen.
In App.js:
import React from 'react';
import Toggle from './Toggle';

function App() {
  return (
    <div>
      <Toggle />
    </div>
  );
}

export default App;
The output initially shows a button with the text OFF. When you click the button, the text will change to ON and OFF with each click.
Rules of Hooks
Now that you know how to use the useState hook in React, you must follow the 2 Rules for Hooks:
- Call Hooks on the Top Level: Never call the hooks inside conditions, loops and nested functions. Instead, always call them within the body of the main component function.
- Call Hooks from React Functions: Either call the hooks directly within the body of the functional component or in another custom hook.
Following these fundamental rules will help you avoid any unnecessary errors or unexpected results after rendering.
Lifting the States
Until now, we have used the useState hook to let components manage their states independently. But, in more complex applications, there are situations where you may need to share the state between sibling components or make it accessible to the parent component. In such scenarios, the common approach, known as Lifting State Up, is moving the state to a common ancestor component and then using props to pass down the data and update functions as required. You can explore this topic on your own as a bonus.
In this article, we learned how to make our components interactive using the useState hook. Next up, we'll learn event handling in React to make our apps responsive.